How to Test a Website Before Launch: A Step-by-Step QA Process
Why Website Testing Before Launch Matters
A website can look finished and still contain serious problems.
A page may display correctly while:
- a contact form does not deliver;
- checkout fails on mobile;
- navigation breaks in Safari;
- a password reset email never arrives;
- analytics does not record conversions;
- important pages are accidentally set to noindex;
- users can access something they should not;
- a production integration still points to staging.
These problems are much easier to find before launch than after real users encounter them.
Website QA provides a structured way to verify that the site is ready for production.
If you are new to the subject, start with What Is Website QA? A Complete Guide to Website Quality Assurance.
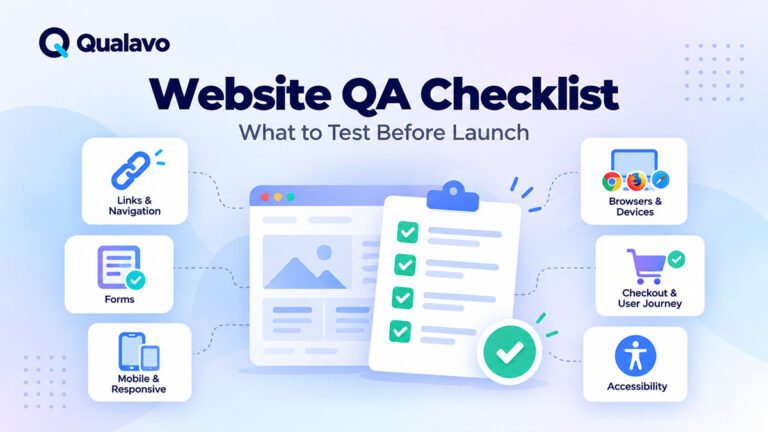
For a checklist-style companion to this process, see Website QA Checklist: What to Test Before Launch.
Website QA Should Be a Process, Not a Final Click-Through
A common approach to pre-launch testing is:
Open the website, click around for a while, and see whether anything looks broken.
That can find obvious defects.
But it is not a reliable QA process.
Important areas can easily be missed because there is no defined:
- scope;
- environment;
- browser coverage;
- test priority;
- defect process;
- release criteria.
A stronger approach is:
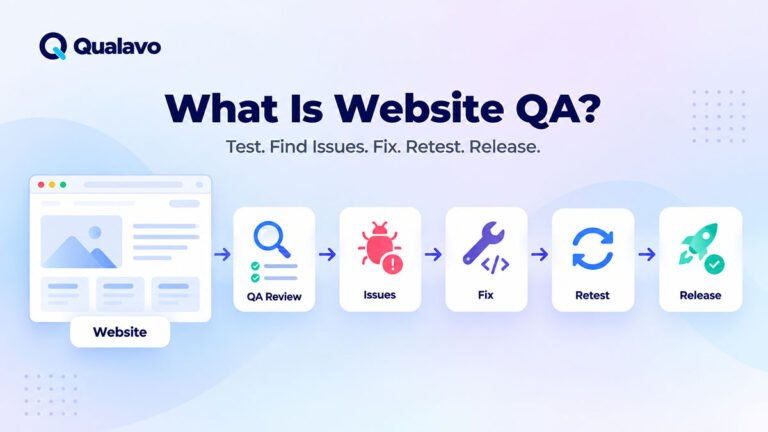
Plan → Test → Report → Fix → Retest → Review → Launch → Verify
The following process can be adapted to marketing websites, WordPress projects, e-commerce stores, and web applications.
Step 1: Understand What Is Being Released
Before testing anything, understand the release.
Ask:
- Is this a completely new website?
- A redesign?
- A migration?
- A feature release?
- A WordPress update?
- An e-commerce change?
- A production hotfix?
The answer affects the scope.
A new website may need broad coverage across the whole system.
A small maintenance release may need targeted regression testing around the changed area.
Do not begin with:
Test everything.
Begin with:
What changed, what matters, and what could break?
Step 2: Define the QA Scope
Write down what QA is responsible for verifying.
Typical scope areas may include:
- pages and templates;
- navigation;
- forms;
- user accounts;
- checkout;
- browsers;
- devices;
- integrations;
- accessibility;
- SEO sanity checks;
- security sanity checks;
- analytics;
- production verification.
Also define what is not included.
For example:
- formal penetration testing;
- load testing;
- legal review;
- full copywriting review;
- unsupported browsers.
Clear exclusions prevent stakeholders from assuming something was tested when it was not.
For a detailed framework, see How to Define QA Scope for a Website Project.
Step 3: Identify Critical User Journeys
Do not give every page equal priority.
Identify what users must be able to accomplish.
For a marketing website:
Homepage → Service Page → Contact Form → Confirmation
For e-commerce:
Product → Cart → Checkout → Payment → Order Confirmation
For SaaS:
Signup → Verification → Login → Core Workflow
These are critical user journeys.
If a minor footer link fails, the website may still be usable.
If checkout fails, the business may be unable to make sales.
Critical journeys should therefore receive deeper testing.
Step 4: Prepare a QA Test Plan
For larger projects, document how testing will work.
A useful test plan can define:
- scope;
- environment;
- browsers;
- devices;
- responsibilities;
- test data;
- risks;
- entry criteria;
- exit criteria;
- defect workflow.
The plan does not need to become a large formal document.
Its purpose is to remove ambiguity before testing begins.
For a practical structure, see How to Create a Website QA Test Plan.
Step 5: Confirm the Test Environment Is Ready
QA becomes inefficient when testing begins on an unstable build.
Before starting, confirm:
- required features are deployed;
- staging is accessible;
- test accounts work;
- integrations are configured;
- test data exists;
- known blockers are understood.
If developers are still changing major parts of the site every few minutes, defects may become invalid before they are reviewed.
Testing can begin before development is completely finished, but the environment should be stable enough for meaningful results.
Step 6: Test the Critical User Journeys First
Start with the highest-risk flows.
Do not spend the first hour finding minor spacing defects while checkout is completely broken.
Run each critical journey from beginning to end.
For example:
Landing Page → Product → Cart → Checkout → Payment → Confirmation
Verify both:
- what the user sees;
- what actually happens behind the interface.
A successful confirmation screen is not enough if the order never reaches the backend.
Step 7: Test Navigation and Links
Verify the basic structure of the site.
Check:
- header navigation;
- footer navigation;
- buttons;
- text links;
- logo link;
- breadcrumbs;
- pagination;
- anchor links;
- external links.
Look for:
- broken URLs;
- unexpected redirects;
- links pointing to staging;
- incorrect destinations;
- links opening unexpectedly.
Important navigation should also work on mobile.
Step 8: Test Forms Properly
Forms are one of the most important areas of website QA.
For every important form, test:
Valid Submission
Complete the form correctly.
Required Fields
Leave required fields empty.
Invalid Input
Try invalid email addresses or other incorrect formats.
Optional Fields
Confirm optional fields really are optional.
Confirmation
Verify the expected success message or redirect.
Delivery
Confirm the submission reaches its destination.
That destination may be:
- an inbox;
- CRM;
- database;
- marketing platform.
A form is not successfully tested simply because it displays:
Thank you.
The data must complete the full workflow.
Step 9: Test Validation and Error Handling
Users do not always follow the happy path.
Test how the website behaves when something goes wrong.
Examples include:
- missing required data;
- invalid formats;
- expired links;
- unavailable integrations;
- failed payment;
- nonexistent pages;
- unauthorized access.
Good error handling should explain the problem without exposing unnecessary technical information.
Avoid systems that fail silently.
Step 10: Test Responsive Layouts
Do not test only on your normal desktop monitor.
Check representative viewport ranges such as:
- small mobile;
- standard mobile;
- tablet;
- laptop;
- desktop.
Look for:
- horizontal scrolling;
- clipped text;
- overlapping elements;
- broken grids;
- unreadable buttons;
- modal problems;
- navigation failures;
- images that overflow;
- forms that become unusable.
Pay particular attention near responsive breakpoints.
A page may look correct at 390px and 1024px while breaking at an intermediate width.
Step 11: Test Across Relevant Browsers and Devices
Chrome alone is not sufficient browser coverage for many websites.
Define supported environments based on:
- audience;
- analytics;
- business requirements;
- risk.
Common candidates include:
- Chrome;
- Safari;
- Edge;
- Firefox;
- iPhone Safari;
- Android Chrome.
For a systematic approach, see Browser and Device Test Matrix: How to Choose What to Test.
For deeper browser-specific testing, see Cross-Browser Testing Guide: How to Test Websites Across Browsers.
Step 12: Test Real Devices Where Risk Justifies It
Browser emulation is useful.
It is not identical to a physical phone.
Real devices can expose problems involving:
- touch interaction;
- virtual keyboards;
- mobile Safari;
- viewport behavior;
- file upload;
- authentication;
- payment.
You do not necessarily need dozens of physical devices.
Use real devices strategically for important workflows.
Step 13: Review Content and Media
Functional correctness is not enough if the site contains incorrect content.
Check important pages for:
- placeholder text;
- spelling mistakes;
- incorrect prices;
- outdated information;
- missing images;
- broken downloads;
- incorrect contact details;
- inconsistent button text.
Also verify that images:
- load correctly;
- use appropriate sizing;
- do not distort;
- have meaningful alternative text where required.
Step 14: Check Heading Structure and Basic Accessibility
Website QA should include practical accessibility checks.
Review:
- page headings;
- keyboard navigation;
- visible focus;
- form labels;
- validation messages;
- color contrast;
- image alternative text;
- zoom and reflow.
Try navigating important pages with the keyboard.
Can you:
- reach controls;
- see where focus is;
- activate buttons;
- use menus;
- close dialogs?
For a more complete framework, see Website Accessibility Testing Checklist: A Practical QA Guide.
Step 15: Test Authentication and User Accounts
If the website has accounts, test the entire authentication lifecycle.
This may include:
- signup;
- email verification;
- login;
- invalid login;
- logout;
- password reset;
- protected pages;
- session behavior.
Do not test only with an administrator account.
Use representative normal users as well.
For a dedicated guide, see How to Test Login, Signup and Password Reset Flows.
Step 16: Test Roles and Permissions
If different users have different capabilities, verify the boundaries.
For example:
- administrators;
- editors;
- customers;
- subscribers;
- custom user roles.
Check both directions:
Can the user access what they should?
and:
Can the user access something they should not?
Permission defects can become serious security and privacy issues.
Step 17: Test E-commerce Workflows
For online stores, test the complete transaction lifecycle.
Coverage may include:
- product pages;
- variants;
- pricing;
- inventory;
- cart;
- coupons;
- shipping;
- tax;
- checkout;
- payment;
- confirmation;
- order creation;
- transactional email.
Verify that totals remain consistent throughout the journey.
For broader coverage, see E-commerce Website Testing Checklist: What to Test Before Launch.
For checkout specifically, see How to Test an E-commerce Checkout Flow.
Step 18: Test Third-Party Integrations
Modern websites rarely operate alone.
They may connect to:
- payment providers;
- CRM platforms;
- email services;
- analytics;
- maps;
- booking platforms;
- APIs.
Test the full integration whenever possible.
For example:
Website Form → CRM Record → Notification Email
A successful frontend action does not prove that the external system received the information.
Step 19: Perform Basic Security Sanity Checks
Routine website QA is not penetration testing.
But testers can still check important security-related behavior.
Examples include:
- HTTPS works;
- protected pages require authentication;
- user permissions behave correctly;
- sensitive data is not exposed unexpectedly;
- production debug output is disabled;
- staging systems are not accidentally public.
For practical coverage, see Website Security QA Checklist: Basic Checks Before Launch.
For the distinction between routine QA and specialist security assessment, see Security Testing vs Penetration Testing: What’s the Difference?.
Step 20: Check Basic SEO Configuration
A website can work perfectly for users while having launch-critical SEO problems.
Check important areas such as:
- page titles;
- meta descriptions;
- canonical URLs;
- indexing settings;
- robots directives;
- XML sitemap;
- redirects;
- HTTPS URLs.
One particularly dangerous mistake is leaving a production website set to:
noindex
because the staging site used that configuration.
QA should catch obvious technical SEO release problems even when a full SEO audit is outside scope.
Step 21: Check Analytics and Conversion Tracking
Confirm that production tracking is configured correctly.
Depending on the project, test:
- page views;
- form conversions;
- signup events;
- purchases;
- important CTA events.
For e-commerce, verify that purchase tracking does not fire twice.
For lead-generation sites, confirm successful forms generate the intended conversion event.
Analytics failures may be invisible to users but still damage business reporting immediately after launch.
Step 22: Check Performance Sanity
You do not necessarily need a full performance audit during every QA cycle.
But watch for obvious problems such as:
- very slow pages;
- huge images;
- delayed interactions;
- broken lazy loading;
- unusually slow forms;
- excessive layout movement.
A website that technically works but feels extremely slow may still provide a poor launch experience.
Step 23: Test 404 and Failure Pages
Try a nonexistent URL.
Check that the 404 page:
- loads correctly;
- clearly explains what happened;
- provides useful navigation;
- does not expose technical errors.
If the application has other failure states, verify those as well.
Examples include:
- expired links;
- unavailable content;
- disconnected integrations.
Step 24: Check the Browser Console on Important Pages
Developer tools can expose technical problems that are not immediately visible.
Look for:
- JavaScript errors;
- failed resources;
- failed API requests;
- CORS errors.
Not every warning is a release blocker.
Focus on new errors associated with actual website behavior.
Step 25: Report Defects Clearly
When you find a problem, make it reproducible.
A good defect report should normally include:
- clear title;
- environment;
- page or URL;
- steps;
- expected result;
- actual result;
- severity;
- evidence.
For a reusable format, see Bug Report Template: What Every Defect Report Should Include.
Avoid reports such as:
Form broken.
A developer needs enough information to reproduce the problem efficiently.
Step 26: Prioritize Defects
Not every issue has the same impact.
A useful severity model might be:
Critical
Blocks a critical business function or release.
High
Major functionality is broken.
Medium
Important but limited impact.
Low
Minor visual or usability problem.
Prioritize based on business impact rather than how visually noticeable the defect is.
A tiny checkout failure may matter much more than a large cosmetic defect on a low-traffic page.
Step 27: Retest Fixes
A developer changing the code does not mean the defect is verified.
The workflow should be:
Report → Fix → Ready for Retest → Retest → Close
Reproduce the original issue after the fix.
Then confirm that the expected behavior now works.
For larger fixes, also consider related regression testing.
Step 28: Run Regression Testing
Fixes can break existing functionality.
Before release, rerun the most important stable workflows.
Typical regression areas include:
- navigation;
- forms;
- authentication;
- checkout;
- integrations;
- critical user journeys.
The regression suite should be risk-based.
Do not blindly rerun every possible test after every small change.
Step 29: Compare Planned Scope With Actual Coverage
Before declaring QA complete, ask:
- What did we plan to test?
- What was actually tested?
- What could not be tested?
- What remains uncertain?
For example:
iPhone Safari payment verification was not completed because the provider’s sandbox was unavailable.
That limitation should be visible.
Do not turn incomplete coverage into a generic:
QA passed.
Step 30: Review Open Defects Before Launch
Group remaining issues by severity and risk.
Ask:
- Are any Critical defects open?
- Are important workflows affected?
- Is there a workaround?
- Has the client or product owner accepted any known issues?
- Is additional retesting required?
This turns the defect list into release information.
Step 31: Make a Release Readiness Decision
A website is not ready simply because testing happened.
Release readiness combines:
- testing coverage;
- critical workflow results;
- open defects;
- known limitations;
- operational readiness;
- remaining risk.
For the broader concept, see What Is Release Readiness? A Guide to Website Launch Decisions.
A practical decision may be:
Go
The release can proceed.
Conditional Go
The release can proceed with explicitly accepted conditions.
No-Go
The remaining risk is too high.
Use Go/No-Go Checklist: Is Your Website Ready to Launch? for a structured review.
Step 32: Prepare for Launch Day
Before deployment, verify operational items such as:
- backup;
- rollback capability;
- production credentials;
- DNS where relevant;
- redirects;
- analytics;
- integrations;
- responsible team members.
For a dedicated launch-day framework, see Website Launch Checklist: What to Verify on Launch Day.
Do not assume that passing staging QA guarantees a perfect production deployment.
Step 33: Run a Production Smoke Test
Immediately after deployment, verify that the website is fundamentally operational.
Focus on:
- homepage;
- critical pages;
- navigation;
- important form;
- authentication;
- checkout if applicable;
- critical integrations;
- tracking.
Production can behave differently because of:
- caching;
- credentials;
- server configuration;
- CDN;
- email;
- live APIs.
For the complete process, see Post-Deployment Smoke Testing: What to Check After Release.
Step 34: Monitor the Website After Launch
QA does not necessarily end the second the smoke test passes.
For important releases, monitor for:
- error reports;
- form failures;
- payment problems;
- unexpected analytics changes;
- customer-reported issues.
Some problems only appear under real production conditions.
The highest-risk launches may need a short stabilization period before the release is considered fully complete.
A Practical Pre-Launch QA Workflow
A reusable workflow can look like this:
Understand the Release
↓
Define QA Scope
↓
Identify Critical User Journeys
↓
Prepare Environment and Test Data
↓
Execute Functional Testing
↓
Test Responsive Layouts and Browsers
↓
Test Accessibility, Security and SEO Sanity
↓
Verify Integrations and Analytics
↓
Report Defects
↓
Fix and Retest
↓
Run Regression Testing
↓
Review Release Risk
↓
Go / Conditional Go / No-Go
↓
Deploy
↓
Production Smoke Test
↓
Monitor
This is much more reliable than an unstructured final click-through.
Pre-Launch Website QA Checklist
Before approving a website release, verify that:
- QA scope is defined.
- Critical user journeys are identified.
- Stable test environment is available.
- Required test data exists.
- Navigation works.
- Forms work end-to-end.
- Validation and errors work.
- Responsive layouts are tested.
- Supported browsers are tested.
- Important real devices are covered where needed.
- Authentication works.
- Permissions work.
- E-commerce workflows work where relevant.
- Third-party integrations work.
- Basic accessibility checks pass.
- Basic security sanity checks are complete.
- SEO configuration is reviewed.
- Analytics and conversions are verified.
- Major defects are fixed or explicitly accepted.
- Fixes are retested.
- Regression testing is complete.
- Release readiness is reviewed.
- Rollback capability exists.
- Production smoke testing is planned.
Common Pre-Launch QA Mistakes
Testing Only the Homepage
A polished homepage does not prove critical workflows work.
Testing Only Chrome
Browser-specific defects may remain undiscovered.
Testing Only Desktop
Mobile may represent a large share of real users.
Testing Only Happy Paths
Users make mistakes and systems fail.
Checking Forms Without Verifying Delivery
The interface may succeed while the backend integration fails.
Ignoring Retesting
A reported bug is not resolved until the fix is verified.
Launching Immediately After the Final Fix
The last fix can introduce a new regression.
Assuming Staging Equals Production
Production-specific configuration can create new problems.
How Much Testing Is Enough?
There is no universal number of test cases that makes a website ready.
The appropriate depth depends on:
- complexity;
- business impact;
- user volume;
- integrations;
- sensitive data;
- release size;
- available time.
A five-page marketing site and a multi-role SaaS application should not receive identical QA coverage.
The goal is not:
Test absolutely everything.
The goal is:
Test enough of the right things to understand the remaining release risk.
Prioritize Risk When Time Is Limited
If the release window becomes shorter than expected, do not randomly remove tests.
Prioritize:
- Critical user journeys
- Revenue-generating workflows
- Authentication and permissions
- Forms and integrations
- Recently changed areas
- Primary browsers and devices
- Production-critical configuration
Reduce lower-risk coverage first.
Then document what was not tested.
Report What Was Actually Tested
At the end of the QA cycle, avoid vague conclusions such as:
Everything was tested and looks good.
A stronger summary might say:
QA covered critical user journeys, contact forms, responsive layouts, Chrome, Safari, Edge, accessibility sanity checks, basic security checks, analytics configuration, and production smoke testing. Two Low-severity visual issues remain open and do not affect release-critical functionality.
This gives stakeholders meaningful information.
For client-facing reporting, see How to Write a Website QA Report for Clients.
Make the Process Repeatable
The biggest advantage of a structured QA process is not only finding more bugs.
It is repeatability.
Instead of reinventing testing for every release, maintain reusable:
- scope templates;
- browser matrices;
- regression checklists;
- defect templates;
- release-readiness checks;
- smoke tests.
Then adjust them for each project’s actual risk.
This improves consistency without removing tester judgment.
Final Thoughts
Testing a website before launch should be more than clicking through a few pages.
A reliable QA process starts by defining what matters.
Then it systematically verifies:
critical user journeys, functionality, forms, responsive layouts, browsers, devices, accessibility, security sanity, SEO, integrations, analytics, and release readiness.
Defects are reported.
Fixes are retested.
Critical workflows are rerun.
Remaining risk is reviewed before deployment.
And after launch, the production website is verified again.
The process can be summarized as:
Plan → Test → Report → Fix → Retest → Review → Launch → Verify
That structure turns pre-launch website testing from an informal final check into a repeatable quality process.