Website Launch Checklist: What to Verify on Launch Day
Why Launch Day Needs Its Own Checklist
Website launch day is different from normal QA.
Before launch, the team usually tests in:
- development;
- staging;
- UAT;
- preview environments.
After deployment, the website is exposed to:
- real production configuration;
- real DNS;
- real SSL;
- live integrations;
- live analytics;
- real users;
- live caching;
- production email;
- payment and API settings.
A website can pass pre-launch QA and still fail after deployment.
That is why launch day needs a dedicated checklist.
The purpose is to confirm that the release is not only deployed, but operational.
For the broader release decision process, see:
Go/No-Go Checklist: Is Your Website Ready to Launch?
Launch Day QA Is Not the Same as Full Regression Testing
Launch-day verification should be focused.
You are not trying to repeat the entire QA cycle.
You are trying to answer:
Did the website deploy correctly, and are the most important production workflows working?
A good launch-day process concentrates on:
- site availability;
- critical pages;
- forms;
- authentication;
- checkout;
- integrations;
- redirects;
- analytics;
- SEO settings;
- email;
- security basics;
- release health.
A deeper regression cycle may continue after launch.
1. Confirm the Production Website Is Live
Start with the most basic check.
Open the production URL.
Verify:
- the website loads;
- correct domain is used;
- no staging URL appears;
- no maintenance page remains active;
- no server error appears;
- production content is visible.
Test both:
- homepage;
- at least one internal page.
If the site does not load reliably, stop and investigate before continuing.
2. Verify HTTPS
Check that the website loads securely.
Confirm:
- HTTPS works;
- no certificate warning appears;
- certificate is valid;
- HTTP redirects to HTTPS if required;
- no obvious mixed-content warnings appear.
A production website should not launch with broken SSL behavior.
3. Check the Primary Domain
If several domain variants exist, verify redirect behavior.
Examples:
http://example.com
The intended canonical version should be consistent.
Unexpected domain behavior can affect:
- users;
- analytics;
- SEO;
- cookies;
- authentication.
4. Check DNS Behavior
If launch involves DNS changes, verify the domain resolves correctly.
Things to check:
- correct production server;
- no old staging server;
- primary domain works;
- expected subdomains work.
DNS propagation can take time, so results may vary temporarily by location or network.
Document expected launch behavior in advance.
5. Open Critical Pages
Check the pages that matter most to the business.
Examples:
- homepage;
- service pages;
- pricing;
- contact;
- signup;
- login;
- checkout;
- account;
- booking;
- confirmation pages.
Verify:
- page loads;
- content is correct;
- layout looks normal;
- no missing assets;
- no obvious production-only errors.
Do not spend launch day checking every low-priority page first.
Start with business-critical pages.
6. Test Main Navigation
Verify:
- header navigation;
- dropdown menus;
- mobile menu;
- logo link;
- footer navigation;
- primary CTA.
Check that all links point to production URLs.
A common launch defect is a navigation link that still points to:
- staging;
- localhost;
- development subdomain.
7. Check Internal Links
Review priority links.
Look for:
- broken links;
- staging links;
- incorrect redirects;
- outdated page paths.
You do not necessarily need to manually click every link on launch day.
Prioritize:
- navigation;
- CTA buttons;
- forms;
- important content links;
- product links.
8. Verify Redirects
If URLs changed during redesign or migration, test important redirects.
Examples:
Old:
/services-old/
New:
/services/
Check:
- old URL redirects;
- destination is correct;
- redirect does not loop;
- no unexpected 404 appears.
Redirect failures can damage both user experience and SEO.
9. Check the 404 Page
Open a deliberately invalid URL.
Example:
/this-page-does-not-exist/
Verify:
- custom 404 page appears;
- navigation still works;
- no server error appears;
- user can recover easily.
10. Test Contact Forms
Forms are one of the highest-priority launch checks.
For each important form:
- submit valid data;
- verify success message;
- confirm data is received;
- confirm email notification is delivered.
Check:
- required fields;
- form destination;
- sender;
- recipient;
- production links.
Do not stop after seeing a success message.
11. Verify Lead Delivery
For lead-generation websites, confirm the full chain.
Example:
Website Form → Email → CRM
Check:
- form submitted;
- enquiry received;
- CRM record created where applicable;
- notification delivered.
A form that appears successful but loses the lead is a serious production problem.
12. Test Login
If the site has authenticated users, verify login.
Check:
- valid login;
- dashboard/account loads;
- correct role;
- session works;
- logout works.
Also test a protected URL after logout.
For deeper authentication QA:
How to Test Login, Signup and Password Reset Flows
13. Test Signup
If new users can register:
- create a test account;
- verify required fields;
- check confirmation state;
- verify email delivery;
- verify account activation.
Make sure the process uses the production domain.
14. Test Password Reset
Request a password reset.
Verify:
- reset email arrives;
- correct domain is used;
- reset link works;
- new password can be set;
- old password no longer works where expected.
Production email configuration often differs from staging, so this is an important live check.
15. Test Checkout
For e-commerce websites, checkout is a launch-critical flow.
Test:
Product → Cart → Checkout → Payment → Confirmation
Verify:
- product price;
- shipping;
- taxes;
- discount logic;
- payment;
- order creation;
- confirmation page;
- confirmation email.
For deeper coverage:
How to Test an E-commerce Checkout Flow
16. Verify Payment Configuration
Make sure production payment settings are correct.
Check:
- live vs sandbox mode;
- payment provider account;
- currencies;
- transaction state;
- payment result;
- callbacks/webhooks where relevant.
A staging payment configuration left active in production can block real orders.
17. Verify Transactional Emails
Test relevant messages such as:
- contact confirmations;
- order confirmations;
- signup emails;
- password reset;
- booking confirmations;
- internal notifications.
Check:
- email arrives;
- recipient is correct;
- sender is correct;
- links use production URL;
- branding is correct.
18. Check Integrations
Verify important external services.
Examples:
- CRM;
- email service;
- payment gateway;
- booking system;
- chat;
- API;
- marketing automation;
- analytics.
Test the complete business workflow, not only the connection status.
19. Verify Analytics
Check that analytics is actually working in production.
Verify:
- page views;
- key events;
- form submissions;
- purchases;
- conversions.
Do not rely only on the presence of the tracking script.
Confirm data is being received where possible.
20. Verify Tag Manager
If using a tag manager, confirm:
- production container is published;
- correct environment is active;
- tags fire;
- no development container is left active.
21. Check Conversion Tracking
Verify important conversion events.
Examples:
- contact form submitted;
- signup completed;
- purchase completed;
- booking completed;
- CTA clicked.
Missing conversion tracking may not break the site, but it can damage business reporting from day one.
22. Check Search Engine Indexing Settings
One of the most common launch mistakes is leaving the site blocked from search engines.
Verify:
- production pages are not unintentionally
noindex; - robots.txt is correct;
- staging restrictions were removed;
- public pages can be crawled.
In WordPress, review:
Settings → Reading → Search engine visibility
Make sure the final production setting matches the intended launch state.
23. Check the XML Sitemap
Verify:
- sitemap exists;
- sitemap loads;
- production URLs are listed;
- staging URLs are absent.
A common WordPress sitemap path may be:
/wp-sitemap.xml
or an SEO plugin may use another location.
24. Check Canonical URLs
Important pages should use correct canonical URLs.
Look for:
- production domain;
- HTTPS;
- correct page path.
Avoid canonicals pointing to:
- staging;
- development;
- duplicate URLs.
25. Check Page Titles and Meta Descriptions
Review priority pages.
Verify:
- page title exists;
- title is relevant;
- meta description is present where intended;
- no temporary copy;
- no staging branding.
Prioritize:
- homepage;
- product/service pages;
- pricing;
- important SEO landing pages.
26. Check Social Sharing Metadata
Where relevant, verify:
- Open Graph title;
- description;
- image;
- production URL.
This affects how pages appear when shared on:
- Facebook;
- LinkedIn;
- messaging platforms.
27. Check Favicons and Site Identity
Verify:
- favicon loads;
- browser tab title is correct;
- site logo is correct;
- no temporary development branding remains.
These are small details, but very visible immediately after launch.
28. Check Images
Look for:
- broken images;
- missing thumbnails;
- wrong URLs;
- staging image paths;
- oversized assets;
- incorrect aspect ratios.
Priority areas include:
- hero;
- product images;
- logos;
- CTA sections;
- article thumbnails.
29. Check Fonts and Icons
A deployment or CDN issue can break fonts or icons.
Verify:
- fonts load;
- icons display;
- no fallback symbols;
- no empty squares;
- no major layout shifts caused by missing assets.
30. Check Desktop Layout
Perform a fast visual check on a representative desktop viewport.
Look for:
- broken grid;
- overlapping elements;
- incorrect spacing;
- missing content;
- unexpected horizontal scrolling.
31. Check Mobile Layout
Open the website on a representative mobile environment.
Verify:
- navigation;
- hero;
- forms;
- CTA buttons;
- footer;
- key user journey.
Do not rely only on desktop.
Mobile launch defects can affect a large percentage of real users.
32. Check Safari
Safari often deserves a dedicated launch check.
Test critical behavior such as:
- navigation;
- forms;
- layout;
- modals;
- authentication;
- checkout.
For browser coverage planning:
Browser and Device Test Matrix: How to Choose What to Test
33. Check Basic Accessibility
Launch day is not the time for the first accessibility review, but basic production sanity checks are useful.
Verify:
- keyboard navigation;
- visible focus;
- form labels;
- headings;
- zoom;
- primary buttons;
- modal behavior.
For deeper guidance:
WCAG 2.2 Explained for Website QA Teams
34. Check Cookies and Consent
If the site uses cookie consent:
- banner appears when expected;
- settings work;
- consent can be accepted/rejected;
- links work;
- production policies are linked.
Make sure test or placeholder consent configurations were not left active.
35. Check Legal Pages
Verify:
- Privacy Policy;
- Terms;
- Refund Policy where applicable;
- Cookie Policy;
- company details.
Check both presence and links.
36. Check Robots and Staging References
Search for obvious staging indicators.
Examples:
- staging.domain.com;
- dev.domain.com;
- test email addresses;
- placeholder text;
- demo accounts;
- “coming soon” banners.
These are common launch oversights.
37. Check Caching
Caching can make a successful deployment look broken.
Verify:
- latest assets appear;
- old CSS is not served;
- old content is not cached;
- logged-out users see correct content.
Purge:
- page cache;
- CDN cache;
- server cache;
if the release process requires it.
38. Check CDN Behavior
Where a CDN is used, verify:
- assets load;
- HTTPS works;
- latest files are served;
- no stale version remains.
39. Check Performance Sanity
Launch day does not always require a full performance audit.
But check for obvious issues:
- extremely slow page load;
- missing assets;
- repeated requests;
- broken third-party scripts.
If the website becomes dramatically slower in production, investigate.
40. Check Console Errors
Open browser developer tools on important pages.
Look for:
- JavaScript errors;
- failed resource loads;
- CORS errors;
- blocked scripts.
Not every console message is a blocker.
Focus on errors related to real functionality.
41. Check Failed Network Requests
Inspect important workflows for:
- HTTP 4xx;
- HTTP 5xx;
- failed API calls;
- missing assets.
This is particularly useful for:
- forms;
- authentication;
- checkout;
- integrations.
42. Check Basic Security Signals
Routine launch QA is not penetration testing.
But verify basic production security.
Examples:
- HTTPS;
- protected pages require authentication;
- sensitive information not exposed;
- admin areas behave correctly;
- no obvious debug output.
For broader guidance:
Website Security QA Checklist: Basic Checks Before Launch
43. Disable Debug Output
Production users should not see:
- stack traces;
- PHP warnings;
- database errors;
- debug panels;
- development messages.
These can expose technical details and create poor user experience.
44. Check Admin and User Roles
If the website contains multiple roles, confirm:
- correct permissions;
- correct access;
- restricted sections remain restricted.
Production configuration may differ from staging.
45. Confirm Backups
Before or immediately around deployment, confirm:
- database backup;
- files backup;
- latest restore point.
Know where the backup is located.
A backup should not be theoretical.
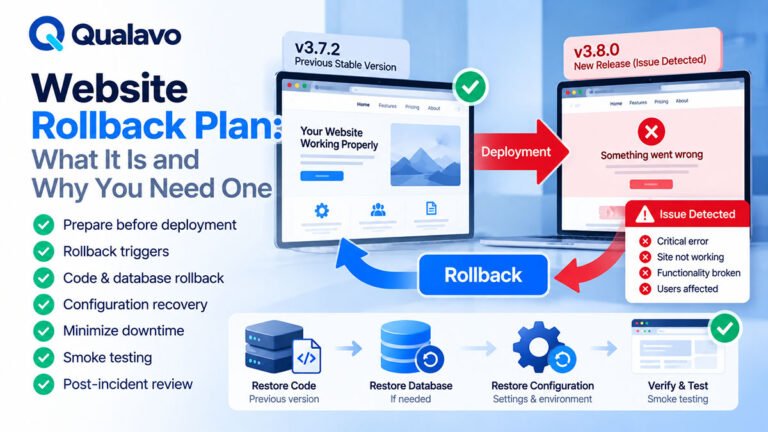
46. Confirm Rollback Readiness
Ask:
If the release fails now, can we restore the previous version?
Know:
- rollback owner;
- rollback procedure;
- previous version;
- data considerations.
47. Record the Deployment
Document:
- deployment date;
- deployment time;
- release/build version;
- person responsible.
Example:
Release: v2.1
Production deployment: 01-Oct-2026 10:15
Owner: Release Manager
This helps later troubleshooting.
48. Record Launch-Day QA Results
Do not rely on memory.
Record:
- checks completed;
- failures;
- fixes;
- retest results;
- final status.
Example:
Launch verification: Passed
Open issues: 1 Low
Critical workflows: Passed
Release status: Live
49. Test After Any Emergency Fix
If a launch-day issue requires a hotfix, retest:
- original defect;
- affected workflow;
- relevant regression area.
Do not assume a rushed production fix is automatically safe.
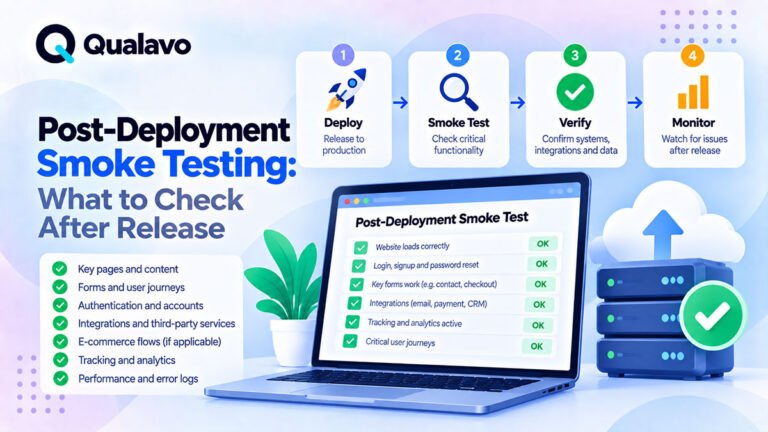
50. Monitor the Website After Launch
Launch QA should transition into monitoring.
Watch:
- error logs;
- uptime;
- forms;
- orders;
- analytics;
- user reports;
- integration failures.
For deeper post-release verification:
Post-Deployment Smoke Testing: What to Check After Release
A Practical Website Launch Checklist
Website Availability
- Production site loads.
- Correct domain works.
- HTTPS works.
- No maintenance mode.
- No obvious server errors.
Navigation and Pages
- Homepage works.
- Critical pages load.
- Main navigation works.
- Mobile navigation works.
- Footer links work.
- Important redirects work.
- 404 page works.
Forms and Workflows
- Contact forms submit.
- Leads are received.
- Signup works where applicable.
- Login works.
- Password reset works.
- Checkout works where applicable.
- Confirmation pages work.
Integrations
- Email delivery works.
- CRM integration works.
- Payment integration works.
- Other critical APIs work.
SEO
- Search indexing settings are correct.
- Robots.txt is correct.
- Sitemap works.
- Canonical URLs use production domain.
- Priority titles/meta descriptions are correct.
Analytics
- Analytics works.
- Important events fire.
- Conversion tracking works.
- Production tag configuration is active.
Visual and Browser QA
- Desktop layout looks correct.
- Mobile layout works.
- Priority browsers checked.
- Images load.
- Fonts/icons load.
Security and Operations
- HTTPS confirmed.
- Debug output disabled.
- Protected pages remain protected.
- Backup confirmed.
- Rollback process available.
Final Release Health
- Critical workflows pass.
- No launch-blocking issue remains.
- Launch QA result is documented.
- Monitoring has started.
Prioritize Launch-Day Checks by Business Risk
If the launch window is limited, do not treat every check equally.
Priority should generally be:
Priority 1
- website availability;
- critical business workflows;
- payment;
- forms;
- authentication.
Priority 2
- integrations;
- email;
- analytics;
- SEO configuration.
Priority 3
- secondary pages;
- minor visual issues;
- lower-risk content.
This keeps the launch team focused if something goes wrong.
Define Who Checks What
Launch day can become chaotic if ownership is unclear.
A simple responsibility model may look like:
Developer
- deployment;
- production configuration;
- technical errors.
QA
- critical user journeys;
- browser/device checks;
- production smoke test.
Marketing
- analytics;
- tracking;
- SEO;
- campaign links.
Project Owner
- final business confirmation.
For smaller teams, one person may cover multiple areas.
The important thing is that no critical area is simply assumed to be someone else’s responsibility.
Use a Launch-Day Runbook
For recurring releases, document the exact sequence.
Example:
Backup → Deploy → Clear Cache → Verify Site → Test Critical Flows → Verify Analytics → Confirm Release
A runbook reduces confusion during time-sensitive releases.
It is especially useful for:
- agencies;
- SaaS teams;
- e-commerce sites;
- frequent deployments.
Do Not Declare Success Too Early
A successful deployment message does not mean a successful launch.
Deployment success means:
The release was deployed.
Launch success requires evidence that:
- production works;
- users can complete critical workflows;
- data is flowing;
- important integrations are operational.
This distinction matters.
Connect Launch Day to Release Readiness
A mature release workflow looks like:
QA → Go/No-Go → Backup → Deploy → Launch Checks → Smoke Test → Monitor
Each stage reduces a different type of risk.
Pre-release QA asks:
Should we deploy?
Launch-day verification asks:
Did the deployment work?
Post-launch monitoring asks:
Is the release staying healthy?
These are separate but connected activities.
Make Launch QA Repeatable
Launch-day verification should not rely on memory.
Use the same baseline for every release, then add project-specific checks.
Qualavo Professional includes structured launch-day execution, rollback planning, post-launch verification, and advanced release-readiness resources.
For agencies managing multiple client releases, Qualavo QA Agency extends this into standardized multi-client release governance and client handover.
Final Thoughts
A website launch is not complete when the files reach production.
It is complete when the team has verified that the live website is functioning correctly.
On launch day, focus first on:
availability, critical workflows, forms, authentication, payments, integrations, SEO configuration, analytics, and production health.
Record the result.
Keep rollback available.
Then continue monitoring.
A repeatable launch checklist reduces the risk of discovering obvious production problems only after users or clients report them.
Need a structured process for launch-day QA and post-release verification? Explore Qualavo Professional.