How to Test a WordPress Website After Plugin Updates
Why Plugin Updates Need QA
Updating a WordPress plugin may look like a routine maintenance task.
Sometimes it is.
But plugins can affect much more than their own settings page.
A plugin update can change:
- frontend markup;
- JavaScript;
- CSS;
- database structure;
- API behavior;
- forms;
- authentication;
- caching;
- email;
- payment;
- third-party integrations.
This means a plugin can update successfully in WordPress while still introducing a functional or visual regression.
The update process itself may show:
Update successful.
That does not necessarily mean:
The website still works correctly.
This is why plugin updates should be followed by focused QA.
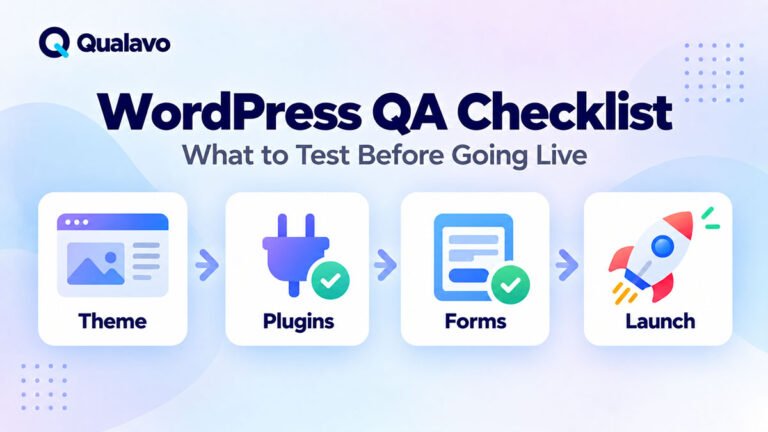
For a broader pre-launch WordPress framework, see WordPress QA Checklist: What to Test Before Going Live.
Not Every Plugin Update Needs the Same Test Depth
A small plugin update that affects only an admin utility may need a light sanity check.
A payment, security, form, page-builder, or membership plugin update may require much deeper regression testing.
The right testing depth depends on:
- what the plugin controls;
- how important the affected workflow is;
- how large the update is;
- whether the update changed dependencies;
- previous defect history;
- whether the update is security-related.
The key principle is:
test according to risk, not according to update size alone.
A small version change can still affect a critical workflow.
Start by Understanding What the Plugin Does
Before updating, identify the plugin’s role.
Ask:
- Does it affect public pages?
- Does it control forms?
- Does it handle payments?
- Does it manage authentication?
- Does it modify page-builder content?
- Does it connect to an external service?
- Does it control caching or SEO?
- Does it change user permissions?
This determines the regression scope.
For example:
A contact-form plugin should trigger testing around:
- form display;
- validation;
- submission;
- email delivery;
- CRM integration.
A payment plugin should trigger testing around:
- checkout;
- payment;
- confirmation;
- order status.
A page-builder plugin should trigger stronger visual and responsive coverage.
Review the Plugin Update Notes
Before installing the update, review the available changelog or release notes.
Look for changes involving:
- compatibility;
- deprecated features;
- database migration;
- API behavior;
- CSS;
- JavaScript;
- authentication;
- security;
- PHP requirements;
- WordPress version requirements.
Release notes do not replace QA.
But they can help identify areas that deserve extra attention.
Check Compatibility Before Updating
Verify the plugin’s stated compatibility with the current environment.
Relevant factors may include:
- WordPress version;
- PHP version;
- theme;
- WooCommerce version;
- page builder;
- related plugins.
A plugin can technically install while still creating incompatibilities with another component.
Use Staging When Possible
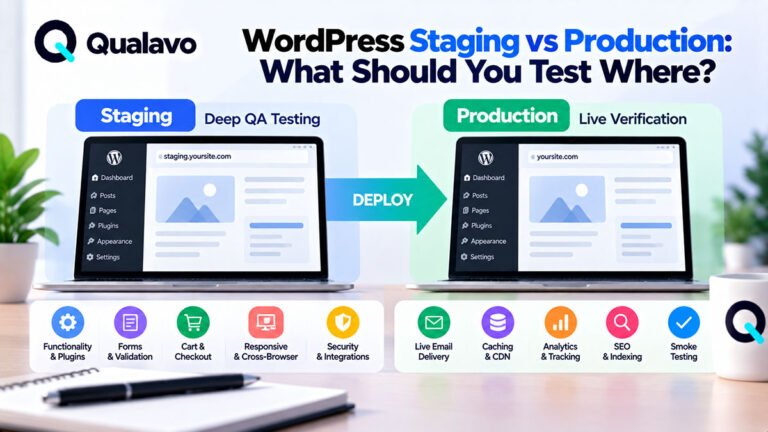
For important websites, test plugin updates in staging before production.
A safer workflow is:
Backup → Update Staging → QA → Fix or Roll Back → Update Production → Smoke Test
This gives the team a chance to identify regressions before users are affected.
Staging is particularly important for:
- WooCommerce;
- membership sites;
- SaaS-like WordPress applications;
- complex forms;
- custom integrations;
- client websites with active traffic.
Confirm a Backup Exists
Before an important update, confirm that recovery is possible.
Depending on the site, backup may include:
- database;
- plugins;
- themes;
- uploads;
- configuration.
The important question is not only:
Is there a backup?
It is:
Can we restore the site if the update causes a serious problem?
A backup without a recovery plan provides limited protection.
Document the Current State
Before updating, note the current plugin version.
For higher-risk updates, it can also help to record:
- WordPress version;
- theme version;
- related plugin versions;
- environment;
- update date.
This makes troubleshooting easier if something changes unexpectedly.
Update One High-Risk Plugin at a Time
Updating many important plugins simultaneously makes troubleshooting harder.
If the website breaks afterward, it may be unclear which update caused the problem.
For high-risk plugins, a safer approach is:
Update → Test → Continue
This is slower than bulk updating everything, but it provides much better fault isolation.
For low-risk maintenance updates, teams may decide that batch updates are acceptable.
Confirm the Update Completed
After updating, verify:
- plugin remains active;
- no fatal error appears;
- no maintenance mode remains;
- admin area loads;
- frontend loads.
Check for obvious WordPress messages such as:
- database update required;
- migration required;
- configuration changed;
- license disconnected.
Do not immediately assume the process is complete because the progress indicator finished.
Check the Homepage First
Open the website in a fresh browser session.
Verify:
- homepage loads;
- header appears correctly;
- navigation works;
- key images load;
- no obvious layout failure;
- no PHP or JavaScript errors are visible.
This provides a quick first indication of whether the update caused a broad regression.
Check the WordPress Admin Area
Some plugin problems affect only the backend.
Verify:
- Dashboard loads;
- plugin settings page opens;
- editor works;
- Media Library works where relevant;
- plugin-specific admin screens work.
Also check whether the plugin added or changed settings unexpectedly.
Test the Plugin’s Primary Function
This should receive the deepest coverage.
If it is a form plugin:
Open Form → Validate → Submit → Confirm Delivery
If it is an e-commerce plugin:
Product → Cart → Checkout → Payment → Confirmation
If it is a membership plugin:
Login → Access Protected Content → Account Action → Logout
If it is an SEO plugin:
Page Metadata → Sitemap → Canonical → Robots Behavior
Test the real user workflow rather than only opening the plugin configuration screen.
Test Critical User Journeys
A plugin update can create regressions outside the plugin’s obvious interface.
Run the site’s critical journeys.
Examples:
Marketing Website
Homepage → Service Page → Contact Form → Lead Received
E-commerce
Product → Cart → Checkout → Payment → Order
Membership Site
Login → Account → Protected Content
Content Website
Homepage → Category → Article → Internal Link
If the site’s primary journey fails after the update, the update should not be considered successful.
Test Forms
Forms are one of the most common areas affected by plugin changes.
Check:
- form loads;
- fields display correctly;
- required validation works;
- submission works;
- success message appears;
- confirmation email arrives;
- CRM or external integration works.
Do not stop after seeing:
Thank you.
Verify the data reached its intended destination.
Test Email Delivery
Plugin updates can affect email workflows directly or indirectly.
Check important transactional messages such as:
- contact form notification;
- account verification;
- password reset;
- order confirmation;
- membership email.
Verify:
- delivery;
- recipient;
- sender;
- subject;
- links.
Production email configuration may behave differently from staging, so critical email flows may also require a production smoke test.
Test Login and Account Flows
If the plugin affects users, sessions, or permissions, test:
- login;
- logout;
- signup;
- password reset;
- protected pages;
- account settings.
For deeper authentication coverage, see How to Test Login, Signup and Password Reset Flows.
Test User Roles and Permissions
Some plugin updates change capabilities or role behavior.
Verify relevant roles such as:
- Administrator;
- Editor;
- Author;
- Customer;
- Subscriber;
- custom roles.
Check that users can access what they should — and cannot access what they should not.
A menu being hidden is not enough.
Where appropriate, test direct access to restricted URLs.
Test WooCommerce and Payment Flows
If the plugin interacts with WooCommerce, payment, tax, shipping, or checkout, test the full purchase journey.
Check:
- product;
- cart;
- coupons;
- shipping;
- tax;
- checkout;
- payment;
- order creation;
- confirmation email.
For deeper coverage, see How to Test an E-commerce Checkout Flow.
If the update touches a payment plugin, this should be treated as a high-risk regression area.
Test Third-Party Integrations
Plugins often connect WordPress to external systems.
Examples include:
- CRM;
- email marketing;
- payment providers;
- analytics;
- booking systems;
- cloud storage;
- social platforms.
Verify the full connection.
For example:
Form Submission → CRM Record → Notification Email
A frontend success message does not prove the integration completed successfully.
Test Page Builder Layouts
Plugins such as page builders or block extensions can affect many pages at once.
Check representative pages containing:
- rows;
- columns;
- cards;
- buttons;
- accordions;
- tabs;
- forms;
- reusable blocks.
Look for:
- broken spacing;
- missing styles;
- altered typography;
- incorrect widths;
- collapsed layouts.
Page-builder updates deserve stronger responsive coverage than many normal plugin updates.
Test Responsive Behavior
Check representative viewport ranges.
For example:
- small mobile;
- standard mobile;
- tablet;
- laptop;
- desktop.
Pay particular attention to components controlled by the updated plugin.
If the plugin controls navigation, test navigation at all relevant breakpoints.
If it controls forms, test the forms on mobile.
For a structured environment strategy, see Browser and Device Test Matrix: How to Choose What to Test.
Test Important Browsers
A plugin update may introduce browser-specific JavaScript or CSS regressions.
At minimum, use the project’s agreed browser matrix.
Typical candidates may include:
- Chrome;
- Safari;
- Edge;
- Firefox.
For browser-specific guidance, see Cross-Browser Testing Guide: How to Test Websites Across Browsers.
If the update affects mobile behavior, include real mobile browsers where risk justifies it.
Check Safari Separately Where Relevant
Safari can reveal issues that are not visible in Chromium-based browsers.
Pay extra attention to:
- forms;
- modals;
- sticky elements;
- payment;
- layout;
- authentication.
If iPhone traffic is important, Safari should not be represented only by desktop Chrome emulation.
Check JavaScript Interactions
Plugin updates may replace or modify frontend scripts.
Test:
- dropdowns;
- modals;
- sliders;
- accordions;
- AJAX forms;
- dynamic filters;
- popups.
Look for controls that appear correctly but no longer respond.
Check Browser Console Errors
Open developer tools on important pages.
Look for new:
- JavaScript errors;
- failed resources;
- CORS problems;
- deprecated API errors.
Not every console warning is a defect.
Focus on errors associated with actual broken behavior.
Check Network Requests Where Relevant
For interactive plugins, inspect key requests if something behaves unexpectedly.
Look for:
- HTTP 4xx;
- HTTP 5xx;
- failed AJAX requests;
- failed API requests.
This can help distinguish a frontend problem from an integration or backend problem.
Check Caching
Caching can hide both successful fixes and new regressions.
After an update, you may need to clear:
- WordPress cache;
- plugin cache;
- server cache;
- CDN cache;
- browser cache.
Then test again.
Otherwise you may be reviewing a mixture of old and new assets.
Check CSS and JavaScript Optimization
Optimization plugins can combine, minify, delay, or defer assets.
After plugin updates, verify:
- styles load correctly;
- JavaScript executes;
- critical interactions still work;
- no new layout shift appears.
Sometimes the plugin itself is fine, but cached or optimized assets become incompatible after the update.
Check Images and Media
If the updated plugin handles:
- galleries;
- image optimization;
- lazy loading;
- sliders;
- video;
verify:
- assets load;
- thumbnails work;
- lazy loading works;
- mobile rendering is correct.
Check Search and Filtering
If the plugin affects search, filters, or archive behavior, test:
- normal search;
- no results;
- multiple filters;
- sorting;
- pagination.
Changes to query behavior may not be obvious on the homepage.
Check Pagination
After updates affecting content, archives, queries, or page builders, verify:
- next page;
- previous page;
- page numbers;
- last page;
- first page.
Also check whether filtering or sorting still behaves correctly across pages.
Check SEO Behavior
SEO plugins deserve specific regression testing.
Review important pages for:
- title;
- meta description;
- canonical;
- robots directives;
- sitemap;
- Open Graph.
Be especially careful after plugin migrations or major SEO-plugin updates.
A page may look unchanged while its indexing configuration changes.
Check the XML Sitemap
If the updated plugin generates the sitemap, verify:
- sitemap loads;
- expected URLs appear;
- staging URLs do not appear;
- important content has not disappeared unexpectedly.
Check Search Engine Visibility
Plugin updates should not accidentally alter site-wide indexing behavior.
For public WordPress sites, verify that the intended search visibility remains unchanged.
This is particularly important around staging-to-production workflows.
Test Accessibility-Sensitive Components
Plugin updates can affect:
- focus;
- keyboard controls;
- form labels;
- modals;
- menus;
- accordions.
For important components, repeat basic accessibility checks.
For a wider accessibility framework, see Website Accessibility Testing Checklist: A Practical QA Guide.
Check Keyboard Navigation
For updated interactive components, use:
- Tab;
- Shift + Tab;
- Enter;
- Space;
- Escape.
Verify important actions remain operable without a mouse.
Check Security-Sensitive Behavior
If the plugin affects:
- authentication;
- permissions;
- forms;
- files;
- user data;
- payment;
include basic security sanity checks.
Examples:
- protected pages remain protected;
- correct roles are enforced;
- debug information is not exposed;
- sensitive data is not visible unexpectedly.
For a broader checklist, see Website Security QA Checklist: Basic Checks Before Launch.
Check for Debug Errors
After updates, make sure visitors do not see:
- PHP warnings;
- database errors;
- stack traces;
- plugin notices;
- fatal errors.
Production users should never become the first people to report debug output.
Check Performance Sanity
A plugin update can make a page technically functional but noticeably slower.
Watch for:
- slower initial load;
- delayed interactions;
- excessive API requests;
- heavy new scripts;
- slow admin pages.
You do not need a full performance audit after every plugin update.
But obvious degradation should be investigated.
Test the Site While Logged Out
Administrators often test websites while logged into WordPress.
That can hide issues related to:
- caching;
- permissions;
- personalization;
- frontend toolbar differences.
Always include a logged-out check for public websites.
A private/incognito window is useful for this.
Test as a Normal User Where Relevant
If the site has accounts, do not test everything as Administrator.
Use representative roles.
The administrator may have permissions and UI behavior that normal users do not.
Retest Existing Plugin-Specific Bugs
If the plugin has caused problems before, include those scenarios in regression testing.
Historical defects are useful because they show where the integration is fragile.
For example:
If a form plugin previously broke Safari validation, test that again after future updates.
Compare Before and After Behavior
For high-risk updates, comparison can help.
Check:
- layout;
- workflow;
- output;
- settings;
- email;
- integration results.
If behavior changed, determine whether it is:
- intentional;
- documented;
- acceptable;
- a regression.
Do Not Treat Every Change as a Bug
Plugin updates can intentionally change:
- styling;
- UI;
- validation;
- settings.
Use release notes and project requirements to distinguish intended changes from regressions.
QA should report unexpected or harmful changes, not merely differences.
A Practical WordPress Plugin Update QA Checklist
Before the Update
- Understand what the plugin controls.
- Review update notes where available.
- Check compatibility.
- Confirm a recent backup.
- Use staging for important updates.
- Record current version.
Basic Health Check
- Plugin remains active.
- WordPress admin loads.
- Homepage loads.
- Important pages load.
- No visible fatal errors.
- No maintenance mode remains.
Functional Regression
- Plugin’s main function works.
- Critical user journeys pass.
- Forms work.
- Emails are delivered.
- Authentication works where relevant.
- Integrations work.
Visual and Responsive QA
- Desktop layout works.
- Mobile layout works.
- Tablet checked where relevant.
- Plugin components display correctly.
- No new overflow or spacing problems.
Browser QA
- Primary browser works.
- Safari checked where relevant.
- Other supported browsers checked according to risk.
Technical Checks
- No critical console errors.
- Important requests succeed.
- Cache cleared where required.
- Optimized CSS/JS behaves correctly.
Accessibility and Security
- Important keyboard interactions work.
- Focus remains usable.
- Permissions remain correct.
- Protected content remains protected.
- No sensitive debug output appears.
Release
- Important defects retested.
- Known issues documented.
- Production update completed.
- Production smoke test completed.
How Much Regression Testing Is Enough?
The answer depends on the plugin’s risk.
A useful model is:
Low-Risk Plugin
Test:
- homepage;
- relevant plugin feature;
- one or two representative pages.
Medium-Risk Plugin
Test:
- plugin feature;
- critical workflow;
- responsive behavior;
- primary browsers;
- related integrations.
High-Risk Plugin
Test:
- full affected workflow;
- regression around dependencies;
- multiple browsers/devices;
- production smoke test.
Examples of high-risk plugins may include:
- payment;
- authentication;
- page builder;
- forms;
- membership;
- security;
- caching.
Do Not Update and Leave Immediately
One common maintenance mistake is:
Update Plugins → See Green Success Message → Leave
A better process is:
Update → Verify → Test → Retest → Monitor
Even a short check provides much more protection.
Update Scope Should Match Change Risk
You do not need to repeat the entire WordPress QA Checklist after every minor plugin update.
Use a stable baseline plus affected-area regression.
For example:
If a form plugin changes:
Form + Email + CRM + Responsive Form + Browser Check
If a page builder changes:
Representative Pages + Components + Responsive + Browser Check
If a payment plugin changes:
Cart + Checkout + Payment + Order + Confirmation
This keeps QA efficient.
Test Production After the Update
Even if staging passes, production can behave differently because of:
- caching;
- server configuration;
- API credentials;
- live payment;
- email;
- CDN.
Run a focused production smoke test.
For the full framework, see Post-Deployment Smoke Testing: What to Check After Release.
Document Problems Clearly
If the update introduces a defect, record:
- plugin/version;
- environment;
- affected page;
- reproduction steps;
- expected result;
- actual result;
- severity;
- evidence.
For a reusable structure, see Bug Report Template: What Every Defect Report Should Include.
This is especially useful if the problem needs to be escalated to:
- plugin vendor;
- hosting provider;
- development team.
Decide Whether to Keep, Fix, or Roll Back
If a serious regression appears, possible responses include:
- configuration fix;
- compatibility fix;
- plugin hotfix;
- disabling affected functionality;
- rollback.
The right choice depends on:
- severity;
- business impact;
- security reason for the update;
- availability of a safe rollback.
A security-critical update may need a different response from an optional feature update.
Connect Plugin QA to Release Readiness
For significant updates, ask:
- Did the core workflow pass?
- Were important browsers tested?
- Are any critical defects open?
- Are integrations working?
- Is production stable?
For a structured decision process, see Go/No-Go Checklist: Is Your Website Ready to Launch?.
Report Actual Coverage
Avoid writing:
Plugin update tested.
Prefer something specific:
Plugin update QA covered the primary workflow, form submission, email delivery, responsive behavior, Chrome and Safari, and production smoke testing.
This makes the result much easier to trust.
Make Plugin Update QA Repeatable
A practical reusable workflow is:
Backup → Update Staging → Verify Plugin → Test Affected Workflow → Run Regression → Retest Defects → Update Production → Smoke Test
This gives the team a predictable process without turning every plugin update into a full-site audit.
Qualavo Professional includes structured WordPress and CMS QA resources for deeper regression testing, release readiness, accessibility, security sanity checks, and client reporting.
Final Thoughts
A successful WordPress plugin update is not defined by the message:
Update completed successfully.
It is defined by whether the website still works correctly afterward.
Focus testing on:
the plugin’s primary function, critical user journeys, integrations, responsive behavior, supported browsers, permissions, and production behavior.
Use deeper regression testing for high-risk plugins.
Use lighter sanity checks for low-risk changes.
Test in staging when possible.
Keep a rollback path.
And always verify the most important workflow after the update reaches production.
That is how plugin maintenance becomes controlled QA instead of trial and error.