How to Create a Website QA Test Plan
What Is a Website QA Test Plan?
A website QA test plan is a document that defines how a website or web application will be tested.
It explains:
- what is in scope;
- what is out of scope;
- which workflows matter most;
- which browsers and devices will be tested;
- which environments will be used;
- who is responsible for testing;
- what risks need extra attention;
- when testing can start;
- when testing can be considered complete.
A test plan does not need to be a long document.
For many website projects, a concise and practical plan is more useful than a complex document nobody follows.
The goal is simple:
Make testing intentional before execution begins.
Why Website QA Needs a Test Plan
Without a test plan, QA can become random.
A tester may:
- click through pages;
- test only the most obvious features;
- forget important browsers;
- skip integrations;
- miss edge cases;
- spend too much time on low-risk areas.
A test plan creates structure.
It helps the team answer:
- What should we test?
- What should we prioritize?
- What environments matter?
- What is the expected level of coverage?
- What could block release?
This improves both efficiency and consistency.
For a broader pre-launch checklist, see:
Website QA Checklist: What to Test Before Launch
A Test Plan Is Not the Same as a Checklist
A checklist tells you:
What should I verify?
A test plan tells you:
How will this project be tested?
A website QA checklist may include:
- navigation;
- forms;
- responsive layout;
- browsers;
- accessibility;
- SEO.
A test plan adds project-specific context such as:
- which pages matter most;
- which browsers are supported;
- which roles exist;
- what is excluded;
- what the release risk is;
- who owns testing.
The two work together.
1. Start With the Project Overview
Begin with a short description of the project.
Include:
- project name;
- website or application type;
- client/product;
- release or version;
- testing environment;
- planned release date.
Example:
Project: Acme Website Redesign
Type: Lead-generation website
Environment: Staging
Planned Release: 15-Oct-2026
This gives the test plan context.
2. Define the QA Objective
Explain what the QA cycle is trying to verify.
Example:
The objective of this QA cycle is to confirm that the redesigned website supports the primary lead-generation journey, works across the agreed browser/device matrix, displays correctly across responsive breakpoints, and is ready for production release.
Keep the objective clear and practical.
3. Define What Is In Scope
The scope should describe what will actually be tested.
Examples:
- homepage;
- product/service pages;
- pricing;
- contact forms;
- signup;
- login;
- checkout;
- responsive layouts;
- browser compatibility;
- accessibility basics;
- integrations.
Example:
In Scope
- Public website pages
- Main navigation
- Contact and lead forms
- Responsive behavior
- Chrome, Safari, Edge and Firefox
- Basic accessibility QA
- Production release readiness
This prevents ambiguity later.
4. Define What Is Out of Scope
This is just as important.
Examples:
- penetration testing;
- full performance testing;
- legacy browsers;
- third-party systems not controlled by the team;
- localization;
- admin features not part of the release.
Example:
Out of Scope
- Penetration testing
- Load testing
- IE compatibility
- CRM internal workflows
- Translation review
This protects the team from unrealistic assumptions.
Why Out-of-Scope Items Matter
If something is not documented, stakeholders may assume it was tested.
For example:
QA completed.
may be interpreted as:
Everything was tested.
That can create problems if:
- accessibility was excluded;
- mobile testing was limited;
- payment was not available in staging;
- integrations were not testable.
Be explicit.
5. Identify Critical User Journeys
Not every page is equally important.
Start with the journeys that matter most to the business.
Examples:
Marketing Website
Homepage → Service Page → Contact Form → Confirmation
E-commerce
Product → Cart → Checkout → Payment → Order Confirmation
SaaS
Signup → Verify Email → Login → Core Action
Booking
Service → Select Time → Booking → Confirmation
These journeys should receive deeper testing than low-risk content pages.
6. Define Test Areas
Break the QA scope into clear test areas.
Typical categories include:
- functional testing;
- responsive testing;
- browser/device testing;
- content testing;
- accessibility testing;
- integration testing;
- security sanity checks;
- release readiness.
This makes coverage easier to understand.
7. Plan Functional Testing
Functional QA checks whether features work.
Examples:
- links;
- menus;
- forms;
- buttons;
- modals;
- search;
- filters;
- authentication;
- checkout;
- integrations.
For each feature, consider:
- positive case;
- negative case;
- boundary case;
- error handling.
8. Plan Responsive Testing
Define the viewport ranges you will test.
For example:
- small mobile;
- standard mobile;
- tablet;
- laptop;
- large desktop.
Do not rely only on one desktop and one mobile size.
Also test around important breakpoints.
For example:
If the layout changes at 768px, test:
- 767px;
- 768px;
- 769px.
9. Define Browser and Device Coverage
Choose browsers and devices deliberately.
Do not simply test whatever is available.
Use:
- analytics;
- target audience;
- client requirements;
- technical risk;
- previous bug history.
Example:
Tier 1
- Chrome / Windows
- Safari / iPhone
- Chrome / Android
Tier 2
- Edge / Windows
- Safari / macOS
- Firefox / Windows
For a deeper framework:
Browser and Device Test Matrix: How to Choose What to Test
10. Define Real Device vs Emulation Coverage
Browser emulation is useful for:
- responsive layout;
- quick viewport checks.
Real devices are more valuable for:
- touch behavior;
- mobile Safari;
- virtual keyboards;
- real viewport behavior;
- mobile forms.
Your test plan should state where real-device testing is required.
11. Plan Form Testing
Forms should be tested beyond successful submission.
For important forms, include:
- valid submission;
- empty required fields;
- invalid input;
- email validation;
- error messages;
- success state;
- actual data delivery;
- notification email.
A form is not fully tested if only the frontend confirmation was checked.
12. Plan Authentication Testing
If the website includes accounts, define coverage for:
- signup;
- login;
- logout;
- password reset;
- verification;
- session behavior;
- roles.
For detailed authentication QA:
How to Test Login, Signup and Password Reset Flows
13. Plan E-commerce Testing
If the project includes e-commerce, add:
- product pages;
- cart;
- shipping;
- tax;
- coupons;
- checkout;
- payment;
- order confirmation;
- inventory;
- email.
For deeper coverage:
E-commerce Website Testing Checklist: What to Test Before Launch
14. Plan Accessibility Testing
Define the expected accessibility scope.
Examples:
- keyboard navigation;
- focus visibility;
- form labels;
- contrast;
- heading structure;
- zoom/reflow;
- automated scan.
If the project targets a standard such as WCAG 2.2 Level AA, document that requirement clearly.
For practical coverage:
Website Accessibility Testing Checklist: A Practical QA Guide
15. Plan Security Sanity Checks
Routine QA can include basic security-related checks such as:
- HTTPS;
- protected pages;
- user roles;
- logout behavior;
- sensitive data exposure;
- debug output;
- basic cookie/header checks.
This is not the same as penetration testing.
For a broader checklist:
Website Security QA Checklist: Basic Checks Before Launch
16. Define the Test Environment
Document where testing will happen.
Possible environments:
- local;
- development;
- staging;
- UAT;
- production.
For example:
Primary QA Environment: Staging
Production Verification: Smoke test only
Also identify environment limitations.
Example:
Payment testing will use sandbox mode in staging. Live payment verification will occur after production deployment.
17. Verify Environment Stability
QA should not begin on an environment that changes constantly without coordination.
Before testing, confirm:
- build deployed;
- required features available;
- test data prepared;
- major development changes paused or controlled.
Otherwise testers may waste time reporting defects caused by incomplete deployment.
18. Define Test Data
Plan the data needed for testing.
Examples:
- user accounts;
- admin accounts;
- test products;
- coupon codes;
- subscription plans;
- sample files;
- addresses;
- form data.
Use realistic but safe test data.
Do not use real customer data unnecessarily.
19. Define User Roles
If different roles exist, list them.
Example:
- Administrator
- Manager
- Standard User
- Guest
Then define which workflows should be tested under each role.
A feature may work correctly for Admin but fail for Standard User.
20. Identify Dependencies
Document important dependencies.
Examples:
- payment provider;
- CRM;
- email provider;
- API;
- authentication provider;
- CDN;
- analytics;
- third-party widgets.
For each important dependency, ask:
- Is it available in staging?
- Can it be tested safely?
- Does it use sandbox mode?
- Does production behave differently?
21. Identify Project Risks
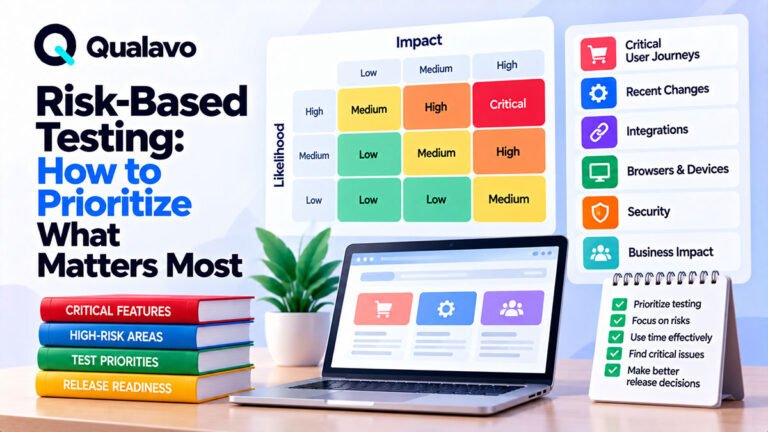
Risk-based testing helps prioritize effort.
Typical risks include:
- new checkout implementation;
- major navigation redesign;
- authentication changes;
- new plugin;
- third-party integration;
- mobile-heavy audience;
- data migration.
Example:
High-Risk Areas
- Checkout
- Payment gateway
- Safari mobile
- CRM integration
These areas should receive deeper coverage.
22. Prioritize by Business Impact
A useful question is:
If this feature fails, what happens to the business?
Examples:
High Impact
- checkout;
- lead form;
- login;
- subscription payment.
Medium Impact
- search filter;
- secondary form;
- account preference.
Lower Impact
- minor layout issue;
- secondary-page spacing.
Business impact should influence test depth.
23. Consider User Frequency
A feature used by 90% of users deserves more attention than one used by 1%.
Prioritize using:
Risk = Impact × Likelihood
You do not need a complex mathematical model.
The concept is enough to guide testing effort.
24. Define Entry Criteria
Entry criteria explain when QA can start.
Examples:
- build deployed to staging;
- critical features complete;
- major known blockers resolved;
- test accounts available;
- requirements available;
- environment stable.
Example:
QA Entry Criteria
- Approved build deployed to staging
- Primary workflows available
- Test data prepared
- Known blocking development issues resolved
This prevents premature testing.
25. Define Exit Criteria
Exit criteria explain when the QA cycle can be considered complete.
Examples:
- planned scope executed;
- critical workflows passed;
- no open Critical defects;
- required High defects resolved;
- fixes retested;
- known issues documented;
- release recommendation prepared.
Example:
QA Exit Criteria
- All Tier 1 workflows tested
- No Critical defects open
- High-severity defects resolved or formally accepted
- Regression testing complete
- Release summary prepared
26. Define Pass and Fail Rules
A test case or workflow should have a clear expected outcome.
For example:
Pass:
The contact form submits, displays confirmation, and sends the enquiry.
Fail:
Any required part of the flow does not complete.
Avoid subjective results such as:
Looks okay.
27. Define Bug Reporting Standards
Before testing begins, decide how defects should be reported.
A standard bug template may include:
- title;
- environment;
- URL;
- steps;
- expected result;
- actual result;
- severity;
- evidence;
- retest status.
For a reusable format:
Bug Report Template: What Every Defect Report Should Include
28. Define Severity Levels
Agree on severity before bugs start arriving.
Example:
Critical
Release blocker or major business failure.
High
Major feature impact.
Medium
Meaningful but limited issue.
Low
Minor visual/content/usability issue.
The important thing is consistency.
29. Define the Bug Lifecycle
A simple lifecycle may be:
New → Reviewed → Assigned → Fixed → Ready for Retest → Closed
This helps everyone understand defect status.
30. Plan Retesting
Every important fixed issue should be retested.
The test plan should define:
- who retests;
- in which environment;
- when the ticket can be closed.
Do not close bugs simply because development marked them fixed.
31. Plan Regression Testing
Fixes and new features can affect existing behavior.
Define a regression baseline.
Typical areas:
- navigation;
- forms;
- login;
- checkout;
- critical integrations.
For each release, run:
Stable Regression Baseline + Release-Specific Tests
This is more efficient than rerunning every possible case after every change.
32. Define Smoke Testing
Smoke testing is a quick check of critical functionality.
Example staging smoke test:
Homepage → Navigation → Main Form → Login → Core Action
Production smoke testing should be planned separately.
For post-release testing:
Post-Deployment Smoke Testing: What to Check After Release
33. Define Responsibilities
Assign ownership clearly.
Example:
Developer
- implementation;
- developer testing;
- fixes.
QA
- functional testing;
- defect reporting;
- retesting;
- regression.
Project Manager
- coordination;
- scope;
- stakeholder communication.
Product Owner / Client
- business acceptance;
- final release approval where required.
Unclear ownership causes missed work.
34. Define Communication
Decide where QA communication happens.
Examples:
- Jira;
- Linear;
- ClickUp;
- Slack;
- Teams;
- email.
Use one primary place for defect tracking.
Avoid defects scattered across:
- chat;
- email;
- screenshots;
- personal notes.
35. Define Evidence Requirements
Decide what evidence is useful.
Examples:
- screenshot for visual bugs;
- video for interaction bugs;
- console error for JavaScript issues;
- request/response for API errors.
Do not require unnecessary evidence for every trivial issue.
36. Define Test Reporting
Decide what the final QA output should include.
Possible outputs:
- test execution summary;
- defect summary;
- known issues;
- release risk;
- recommendation.
For client-facing reporting:
How to Write a Website QA Report for Clients
37. Define Release Decision Rules
Testing should lead to a release decision.
Possible outcomes:
- Go;
- Conditional Go;
- No-Go.
Before release, ask:
- Did critical workflows pass?
- Are blocking defects resolved?
- Is coverage complete?
- Are known issues accepted?
For the full framework:
Go/No-Go Checklist: Is Your Website Ready to Launch?
38. Include Production Verification
The test plan should not stop at staging.
Define what will be checked after deployment.
Examples:
- site availability;
- forms;
- login;
- checkout;
- email;
- integrations;
- analytics.
Production verification should be focused and fast.
39. Include Rollback Awareness
QA does not always own rollback, but the test plan should acknowledge it.
Ask:
- Is a backup available?
- Can the previous release be restored?
- What conditions trigger rollback?
- Who decides?
This becomes important if production smoke testing fails.
40. Define Testing Limitations
Be honest about what cannot be tested.
Examples:
- live payment unavailable before production;
- rare device unavailable;
- third-party sandbox incomplete;
- performance testing excluded.
Document these limitations.
This prevents false confidence.
41. Keep the Plan Proportional to the Project
A small brochure website does not need a 30-page test plan.
A short plan may be enough:
- scope;
- critical pages;
- browsers;
- forms;
- responsive coverage;
- release criteria.
A complex SaaS product may need much more detail.
The process should match project risk.
Example: Simple Website QA Test Plan
Project
Corporate Website Redesign
Objective
Verify that the redesigned website is functionally stable, responsive, accessible at a basic level, and ready for launch.
In Scope
- Public pages
- Navigation
- Contact forms
- Responsive layouts
- Browser compatibility
- Accessibility basics
- SEO sanity checks
Out of Scope
- Penetration testing
- Load testing
- CRM internal workflows
Browsers
- Chrome / Windows
- Safari / iPhone
- Edge / Windows
- Safari / macOS
- Firefox / Windows
Critical Journey
Homepage → Service → Contact Form → Confirmation
Entry Criteria
- Staging build complete
- Test forms configured
- Major development blockers resolved
Exit Criteria
- Critical journey passes
- No Critical defects open
- High defects resolved or accepted
- Regression complete
- Release review completed
Example: E-commerce QA Test Plan
Critical Journey
Product → Cart → Checkout → Payment → Confirmation
High-Risk Areas
- pricing;
- discount;
- shipping;
- payment;
- inventory.
Required Environments
- Chrome Windows
- Safari iPhone
- Chrome Android
Special Testing
- guest checkout;
- logged-in checkout;
- payment failure;
- duplicate payment prevention.
Production Verification
- live payment;
- order creation;
- confirmation email;
- analytics purchase event.
Example: SaaS QA Test Plan
Critical Journey
Signup → Verification → Login → Core Action → Save
User Roles
- Admin
- Standard User
High-Risk Areas
- authentication;
- permissions;
- data persistence;
- integrations.
Regression Baseline
- login;
- dashboard;
- create/edit/delete;
- logout.
Exit Criteria
- no Critical defects;
- role boundaries verified;
- core workflow passes;
- production smoke test prepared.
A Practical Website QA Test Plan Template
You can use this structure:
Project Information
Project:
[Project name]
Release:
[Version/build]
Environment:
[Staging/UAT]
Release Date:
[Date]
Objective
[What this QA cycle is intended to verify]
In Scope
- [Area]
- [Area]
- [Area]
Out of Scope
- [Area]
- [Area]
Critical User Journeys
- [Journey]
- [Journey]
Test Areas
- Functional
- Responsive
- Browser/device
- Forms
- Accessibility
- Integrations
- Security sanity
- Release readiness
Browser and Device Coverage
Tier 1
- [Environment]
Tier 2
- [Environment]
Test Data
- [Account]
- [Product]
- [Coupon]
- [Other]
Risks
- [High-risk area]
- [High-risk area]
Entry Criteria
- [Requirement]
- [Requirement]
Exit Criteria
- [Requirement]
- [Requirement]
Defect Process
Severity: Critical / High / Medium / Low
Workflow:
New → Assigned → Fixed → Retest → Closed
Reporting
- Test summary
- Defect summary
- Known issues
- Release recommendation
Production Verification
- [Smoke test item]
- [Smoke test item]
Website QA Test Plan Checklist
Before testing begins, confirm:
- Project objective is defined.
- In-scope areas are documented.
- Out-of-scope areas are documented.
- Critical user journeys are identified.
- Test areas are defined.
- Browsers/devices are selected.
- Test environment is ready.
- Test data is prepared.
- User roles are identified.
- High-risk areas are documented.
- Entry criteria are defined.
- Exit criteria are defined.
- Bug reporting format is agreed.
- Severity levels are defined.
- Retest process is clear.
- Regression scope is defined.
- Responsibilities are assigned.
- Reporting expectations are clear.
- Production smoke testing is planned.
Avoid Making the Test Plan Too Detailed
A test plan should guide testing.
It should not become administrative overhead.
Avoid documenting things that do not influence:
- scope;
- execution;
- risk;
- reporting;
- release.
If the document becomes difficult to maintain, simplify it.
Update the Plan When the Project Changes
QA plans should not be frozen if the release changes.
Update the plan when:
- features are added;
- scope changes;
- new browsers are required;
- important defects reveal new risk;
- deployment strategy changes.
The plan should reflect the actual release.
Use Risk-Based Testing When Time Is Limited
Testing time is often constrained.
Do not reduce coverage randomly.
Prioritize:
- critical business workflows;
- high-risk recent changes;
- high-traffic environments;
- integrations;
- historically problematic areas.
Lower-risk cosmetic areas can receive lighter coverage.
This gives the best use of limited QA time.
Do Not Confuse More Test Cases With Better QA
A large test plan is not automatically a good test plan.
For example:
200 low-value test cases
may provide less protection than:
30 well-chosen high-risk scenarios
Focus on meaningful coverage.
Make the Test Plan Reusable
A strong QA test plan can become a reusable framework.
Keep a standard core:
Scope → Critical Journeys → Environments → Risks → Entry/Exit Criteria → Defects → Reporting
Then adapt project-specific areas.
This is especially useful for agencies and teams handling repeated website releases.
Connect the Test Plan to Release Readiness
The test plan should lead naturally into the release decision.
At the end of QA, compare:
- planned scope;
- actual coverage;
- open defects;
- known limitations;
- release risk.
Then decide whether the release is ready.
For release decision guidance:
Go/No-Go Checklist: Is Your Website Ready to Launch?
Make Website QA Planning Repeatable
A repeatable QA planning workflow can look like:
Understand Project → Define Scope → Identify Risks → Select Environments → Define Coverage → Execute → Retest → Report → Release Decision
This creates a stronger foundation than starting with random testing.
Qualavo Starter includes structured QA planning, browser/device coverage, bug triage, and release-readiness resources for teams that need a practical website QA process.
For more complex workflows involving advanced testing modules, client reporting, and release management, Qualavo Professional to the Professional product page.
Practical Website QA Test Plan Example
Project: Marketing website redesign
QA objective: Verify that critical user journeys work correctly before production release.
In scope: Homepage, navigation, contact forms, mobile layouts, analytics, core content pages.
Out of scope: Third-party CRM functionality outside the website.
Critical journeys: Landing page → CTA → form submission → confirmation → lead delivery.
Browsers/devices: Chrome, Safari, Edge, current iOS and Android mobile browsers.
Environment: Staging environment using production-like configuration.
Exit criteria: No unresolved critical defects, critical journeys pass, and known lower-severity issues are documented and accepted.
Final Thoughts
A website QA test plan does not need to be complicated.
It needs to answer the important questions:
What are we testing?
What are we not testing?
Which workflows matter most?
Which environments are supported?
What are the major risks?
When is QA complete?
Define these before testing starts.
Then use the plan to keep coverage focused and consistent.
A good test plan reduces random testing, improves communication, and gives the release team a clearer basis for deciding whether the website is ready to launch.
Need a structured framework for planning website QA? Explore Qualavo Starter.