Website QA Checklist: What to Test Before Launch
How to Use This Checklist
Use this checklist as a practical baseline, then adapt it to the size, complexity, and risk level of the website you are testing.
For each item, assign a clear status:
- Pass — the check was completed successfully.
- Fail — an issue was found and needs to be fixed.
- Not Applicable — the check does not apply to this project.
- Retest — the issue was fixed and must be verified again.
- Blocked — the check cannot be completed because of a dependency, missing access, or another unresolved issue.
For every failed item, record at least:
- the issue or expected behavior,
- the severity or business impact,
- the person responsible for the fix,
- and the retest status.
Do not treat every checklist item as equally important. Prioritize critical user journeys such as checkout, login, signup, forms, payments, bookings, or lead generation before lower-risk visual inconsistencies.
The goal is not simply to complete every checkbox. The goal is to make an informed release decision based on the issues found and the risk they create.
Why You Need a Website QA Checklist Before Launch
Launching a website without a structured quality assurance process is risky.
A site may look finished while still containing broken links, form errors, mobile layout problems, missing content, browser inconsistencies, or release-blocking defects.
A website QA checklist helps prevent this.
Instead of relying on memory or random testing, a checklist gives you a repeatable way to verify the most important areas before a website goes live.
If you are new to website quality assurance, start with our guide:
A good checklist does not guarantee a completely bug-free website.
Its purpose is to reduce avoidable risk, improve consistency, and make sure critical areas are not forgotten.
1. Check the Main User Journeys First
Before reviewing individual pages, identify the most important things users need to accomplish.
Examples include:
- submitting a contact form;
- requesting a quote;
- creating an account;
- signing in;
- purchasing a product;
- completing checkout;
- booking an appointment;
- downloading a file;
- searching for information;
- updating account details.
These are your critical user journeys.
Test them from beginning to end.
Do not only check whether individual buttons work. Verify that the complete workflow succeeds.
For example, a contact form journey might include:
- opening the contact page;
- completing the required fields;
- submitting the form;
- seeing the correct success message;
- confirming the message was actually received;
- checking any confirmation email sent to the user.
Critical workflows should receive more attention than low-risk pages.
2. Test Navigation and Links
Navigation problems can make otherwise correct content difficult or impossible to reach.
Check:
- main navigation;
- dropdown menus;
- mobile navigation;
- footer links;
- logo link;
- buttons;
- text links;
- breadcrumbs;
- anchor links;
- external links;
- download links.
Make sure links:
- point to the correct destination;
- do not lead to 404 pages;
- use HTTPS where required;
- open in the expected way;
- have meaningful anchor text.
Avoid generic link labels where a clearer description is possible.
For example, “View QA Starter” is more informative than simply “Click here.”
3. Review Forms and Validation
Forms are one of the most important areas to test because they often connect directly to leads, sales, registrations, or customer support.
Test every important form with both valid and invalid inputs.
Check:
- required fields;
- optional fields;
- email validation;
- phone validation;
- minimum and maximum lengths;
- dropdown fields;
- checkboxes;
- radio buttons;
- file uploads;
- CAPTCHA;
- error messages;
- success messages;
- confirmation emails.
Also verify what happens after submission.
Does the data reach the correct inbox, CRM, database, or external system?
A form that displays a success message but fails to deliver the submitted information is still broken.
4. Test Responsive Design
A website should not only work on desktop.
Review important pages at multiple viewport sizes.
Check:
- desktop;
- laptop;
- tablet;
- mobile.
Look for:
- horizontal scrolling;
- overlapping elements;
- text that becomes too small;
- buttons that are difficult to tap;
- images that overflow;
- broken grids;
- missing content;
- incorrect spacing;
- menus that do not open properly;
- modals that extend beyond the screen.
Responsive testing is not only about appearance.
The site must remain usable.
A mobile user should still be able to complete the same critical actions as a desktop user.
5. Check Browsers and Devices
A website may behave differently across browsers.
At minimum, consider testing important workflows in:
- Chrome;
- Safari;
- Firefox;
- Edge.
Your exact coverage should depend on your audience and analytics.
If a significant portion of users visit from iPhones, Safari becomes particularly important.
If your application is primarily used in a Windows business environment, Chrome and Edge may deserve more attention.
A browser and device test matrix makes this coverage easier to define and repeat.
Do not try to test every browser and device combination in existence.
Prioritize the environments that matter most.
6. Review Content Carefully
Content problems are easy to underestimate.
Before launch, check:
- spelling;
- grammar;
- headings;
- punctuation;
- pricing;
- dates;
- company names;
- product names;
- email addresses;
- phone numbers;
- addresses;
- button text;
- legal information;
- copyright year;
- downloadable files.
Remove:
- placeholder text;
- Lorem Ipsum;
- test content;
- temporary images;
- development notes;
- unfinished sections.
Also make sure terminology is consistent.
For example, do not call the same feature “QA Starter” on one page and “Starter QA” on another unless that difference is intentional.
7. Check Images and Media
Review every important image, video, and downloadable asset.
Check that:
- images load correctly;
- images are not blurry;
- aspect ratios are correct;
- images are not stretched;
- file sizes are reasonable;
- video controls work;
- embedded videos load;
- downloads open correctly;
- image alt text is present where appropriate.
Also check social sharing images if the site uses them.
A page may look correct on the website but appear poorly when shared on LinkedIn, Facebook, or messaging apps.
8. Review Headings and Page Structure
Pages should have a logical heading structure.
A typical page might use:
- one H1;
- H2 headings for main sections;
- H3 headings for subsections.
Avoid using heading levels only for visual styling.
For example, do not use H4 simply because it looks smaller.
The heading structure should reflect the actual content hierarchy.
This helps users, search engines, and assistive technologies understand the page.
9. Check Accessibility Basics
Accessibility should be part of QA, not an afterthought.
Basic checks can include:
- keyboard navigation;
- visible keyboard focus;
- meaningful link text;
- form labels;
- image alt text;
- heading structure;
- color contrast;
- zoom behavior;
- text reflow;
- accessible buttons and controls.
Try navigating the site without a mouse.
Can you reach important interactive elements?
Can you see which element currently has focus?
Can forms be completed using only the keyboard?
For deeper projects, accessibility should be tested against a defined standard such as WCAG.
10. Test Error States
Do not test only the ideal path.
Users make mistakes, services fail, and unexpected conditions happen.
Test scenarios such as:
- submitting an empty form;
- entering invalid information;
- using an expired link;
- requesting a missing page;
- uploading an unsupported file;
- losing an internet connection;
- entering incorrect login credentials.
Check that error messages are:
- visible;
- understandable;
- specific;
- positioned near the problem;
- helpful to the user.
A good error message should explain what went wrong and, where possible, how to fix it.
11. Check 404 and Other Error Pages
Visit a URL that does not exist.
The website should display a useful 404 page.
A good 404 page usually includes:
- a clear explanation;
- a link back to the homepage;
- navigation;
- a way to continue browsing.
Avoid error pages that leave users stranded.
Also check whether server or application errors expose technical information that should remain private.
12. Review Basic SEO Elements
Website QA is not the same as a full SEO audit, but basic SEO checks belong in a pre-launch review.
Check important pages for:
- page titles;
- meta descriptions;
- one clear H1;
- clean URLs;
- canonical URLs where appropriate;
- indexability;
- internal links;
- image alt text;
- robots settings;
- sitemap availability.
A particularly important launch mistake is leaving the website set to discourage search engines from indexing it.
In WordPress, verify the relevant search engine visibility setting before launch.
13. Check Performance
Performance affects both user experience and conversion.
Review:
- large images;
- unnecessary scripts;
- slow pages;
- layout shifts;
- loading states;
- third-party embeds.
You do not need every page to produce identical performance scores.
Instead, focus on obvious problems that harm the experience.
Important pages should load and become usable within a reasonable time under realistic conditions.
14. Test Authentication and User Accounts
If the website includes accounts, test:
- registration;
- email verification;
- login;
- logout;
- password reset;
- failed login attempts;
- profile editing;
- session behavior.
If multiple roles exist, verify permissions.
For example:
- Can a normal user access admin-only content?
- Can one customer access another customer’s data?
- Can logged-out visitors access restricted pages?
Permission problems can be much more serious than visual defects.
15. Review E-commerce Workflows
For an e-commerce website, test the complete purchase journey.
Check:
- product pages;
- variants;
- pricing;
- stock;
- add to cart;
- cart updates;
- coupon codes;
- shipping;
- taxes;
- checkout;
- payment;
- confirmation page;
- confirmation email.
Also test failure scenarios.
What happens if:
- payment fails;
- stock changes;
- a coupon is invalid;
- a required field is missing?
Never assume the checkout works because the cart works.
16. Check Integrations
Modern websites often depend on external services.
Examples include:
- payment providers;
- CRM systems;
- email platforms;
- analytics;
- marketing tools;
- maps;
- chat tools;
- APIs;
- booking systems.
Verify that important integrations work in the actual environment used for launch.
A successful front-end interaction does not always mean the integration completed successfully in the background.
17. Verify Analytics and Tracking
If the website uses analytics or conversion tracking, confirm it before launch.
Check important events such as:
- page views;
- form submissions;
- purchases;
- button clicks;
- signups;
- downloads.
Also verify that tracking does not fire incorrectly or duplicate events.
Bad analytics can make later performance analysis unreliable.
18. Review Legal and Privacy Elements
Depending on the website and jurisdiction, relevant items may include:
- Privacy Policy;
- Terms & Conditions;
- Refund Policy;
- cookie information;
- consent mechanisms;
- company details;
- required disclaimers.
Make sure links to these pages work and the information is current.
19. Retest Fixed Issues
One of the most commonly skipped QA steps is retesting.
When a developer says an issue is fixed, test it again.
Verify:
- the original problem is resolved;
- the fix works in the correct environment;
- related functionality still works;
- the issue does not reappear on another device or browser.
A ticket should not automatically be considered complete simply because a code change was made.
20. Perform a Final Release Readiness Review
Before launch, review the overall status of the project.
Ask:
- Are critical workflows working?
- Are release-blocking bugs resolved?
- Have important fixes been retested?
- Are known issues documented?
- Has browser/device coverage been completed?
- Are required legal pages present?
- Is analytics configured?
- Is rollback or recovery understood?
- Who approves the release?
Not every minor issue needs to block launch.
The important point is that the release decision should be informed and deliberate.
A structured release readiness process helps teams make this decision consistently.
A Simple Pre-Launch Website QA Checklist
Before approving a website for release, confirm:
- Critical user journeys work
- Navigation and links work
- Forms submit correctly
- Form data reaches the correct destination
- Mobile layouts work
- Important browsers were tested
- Content was reviewed
- Images and downloads work
- Accessibility basics were checked
- Error states were tested
- 404 page works
- Basic SEO settings were reviewed
- Search engine visibility is correct
- Important integrations work
- Analytics and tracking work
- Legal pages are present
- Reported fixes were retested
- Known issues are documented
- Release readiness was reviewed
This checklist provides a practical baseline.
Larger or more complex websites will require additional testing.
Checklist-Based QA Should Still Be Flexible
A checklist is valuable because it improves consistency.
But it should not become a substitute for judgment.
Every website has different risks.
An e-commerce project may require extensive checkout testing.
A SaaS application may require role and permission testing.
A marketing site may place more emphasis on forms, responsive design, content, and analytics.
Use a core checklist, then add project-specific checks.
This combination gives you both repeatability and flexibility.
Turn Your Checklist Into a Repeatable QA Process
A checklist becomes much more useful when it is part of a complete QA workflow.
That workflow may include:
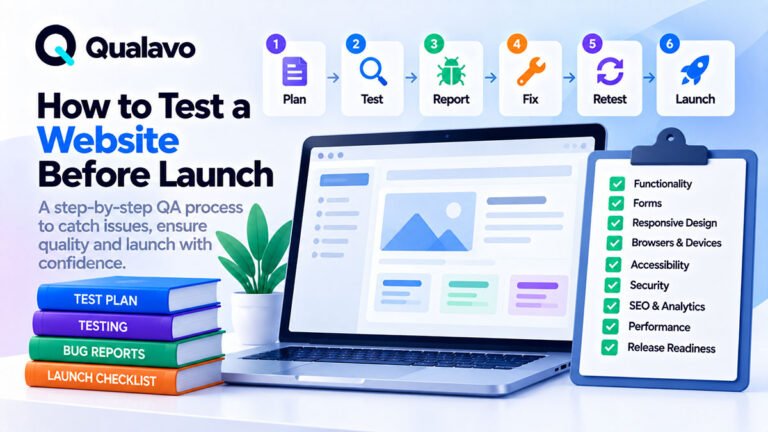
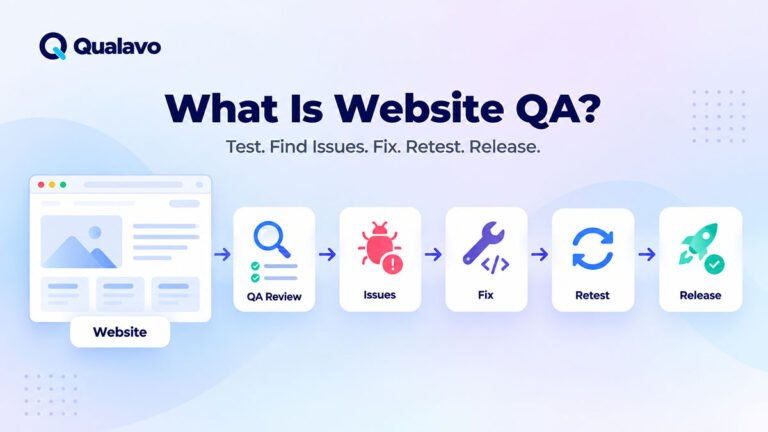
Plan → Test → Report → Fix → Retest → Release
The checklist helps with the testing phase.
Bug reporting helps teams communicate issues clearly.
Retesting confirms that fixes actually work.
Release readiness helps determine whether the website is ready to go live.
For a deeper explanation of the full process, read:
What Is Website QA? A Complete Guide to Website Quality Assurance
Final Thoughts
A website QA checklist gives teams a structured way to review a website before release.
It reduces reliance on memory and helps ensure important areas are not forgotten.
The most effective checklist covers:
- functionality;
- user journeys;
- forms;
- responsive design;
- browsers and devices;
- content;
- accessibility;
- integrations;
- retesting;
- release readiness.
Start with a consistent baseline, then adapt it to the risks and complexity of each project.
The goal is not to make testing unnecessarily complicated.
The goal is to launch with fewer surprises.
When Is the Website Ready to Launch?
A website is ready to launch when the remaining risk is understood and acceptable — not simply when every checklist item has been marked as complete.
Before release, confirm that:
- No critical or release-blocking defects remain unresolved.
- Critical user journeys pass successfully, including forms, login, checkout, payments, bookings, or lead generation where applicable.
- Blocked or incomplete tests are understood, documented, and explicitly accepted as part of the release decision.
- Known lower-severity issues are documented with clear ownership and follow-up actions.
- Retests have been completed for issues that were fixed during QA.
- The release risk has been reviewed and accepted by the person or team responsible for the launch.
A website does not need to be perfect to go live, but the decision should always be informed, documented, and based on the business impact of the remaining issues.
Need a ready-to-use website QA system? Explore the Qualavo QA options and choose the level that fits your workflow.